Excel Exchange allows you to link any input variable in SAM to a cell or range of cells in a Microsoft Excel workbook. This feature allows you to use an external spreadsheet-based model to generate values for SAM input variables. SAM can both import input variable values from an Excel worksheet and export input variable values to the worksheet.
Using Excel Exchange involves the following steps:
•Prepare an Excel workbook for the data exchange.
•In SAM, configure and turn on Excel Exchange.
•In SAM, run a simulation. SAM exchanges data with the Excel workbook during the simulation.
For an example of SAM with Excel Exchange, download the files excel-exchange-example.sam and excel-exchange-example.xlsx from the Sample Files collection in the SAM GitHub repository. To run it, place both files in the same folder on your computer, open the SAM file, and run a simulation.
Notes.
Excel Exchange is designed to allow you to read values of SAM input variables from an Excel workbook. You cannot use Excel Exchange to write values of SAM results to a workbook. If you want to export results to Excel, you can use one of the options described in Export Data and Graphs, or you can write a script to export SAM results.
Excel Exchange works in the Windows version of SAM and requires that Microsoft Excel be installed on your computer. It will not work with other spreadsheet software or in the Mac or Linux versions of SAM.
When SAM runs with Excel Exchange turned on, it exchanges data with a copy of the Excel file in computer memory that you cannot see. It does not modify the file stored on your computer's disk, so you will not see any changes in the workbook values.
If the Excel workbook contains more than one worksheet, SAM can only exchange data with the first worksheet (the worksheet whose tab appears on the leftmost tab).
To prepare an Excel workbook for Excel Exchange:
•Create an Excel workbook with the calculations you want to perform in Excel. Use the first worksheet in the workbook for the data exchange.
•Identify the cells or cell ranges you plan to use for the data exchange. You can refer to them using either ranges (module_cost, NameplateCapacity, etc.) or cell references (A1, C15, etc.).
•For SAM input variables with multiple values specified in SAM using an annual schedule, use the cell reference notation (A1:A12, B15:G15, etc.) rather than a named range.
To configure and turn on Excel Exchange:
1.Create or open the SAM file you want to configure for Excel Exchange.
2.Save the file.
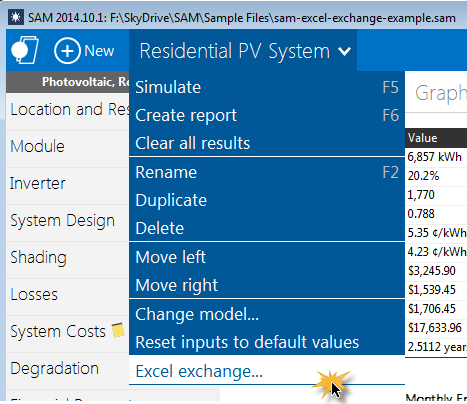
3.On the case menu, click Excel Exchange.
4.In the Excel Exchange Window, check Turn on Excel Exchange for the base case simulation to active Excel Exchange. You can clear the check box to keep the Excel Exchange configuration without running the Exchange when you run a simulation.
5.For Excel file, click the  browse button and choose the Excel file you want to use for the exchange. You can remove the file path if you plan to keep the Excel and SAM files in the same folder.
6.In the Variables list, add the SAM variables you want to use for the data exchange: Click Add to open the input variable browser.
7.For each variable in the list, click its name, and
a.For Excel range, type either the cell reference (A1, C10, etc.) or range name (module_cost, NameplateCapacity, etc.) of the workbook cell or range associated with the SAM variable. Do not enclose the references or names in quotes.
b.Click
Send variable value to Excel if you want to send that variable's value to the Excel workbook, or
Capture variable value from Excel if you want to read that variable's value from the Excel workbook.
8.Click OK.
9.Click Simulate to run a simulation with Excel Exchange.
Excel Data Exchange Reference
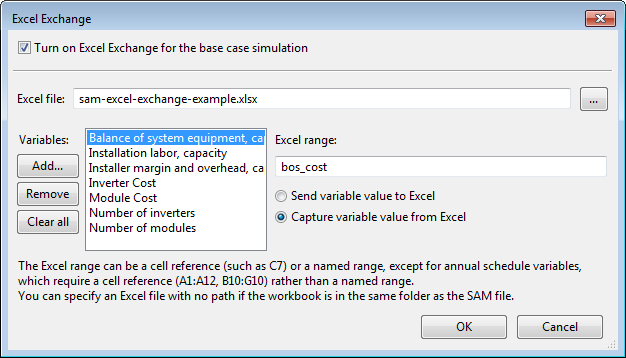
Turn on Excel Exchange for the base case simulation
Check the box to turn on the data exchange.
You can clear the box to keep the Excel Exchange configuration without exchanging data when you run a simulation.
Excel file
The name of the Excel workbook for the data exchange.
If you plan to keep the Excel file in the same folder as the SAM file (.sam), you do not need to include a path in the file name. Use this option if you plan to share the file with someone else, or copy the files to different computers.
Browse
Browse your computer's folders to find the Excel workbook with which you want to exchange data. The workbook can be located in any folder on your computer.
Add
Add one or more input variable from the input pages. You can configure each variable to either send a value to an Excel range, or "capture" a value from an Excel range.
Remove
Delete the highlighted variable from the list.
Clear All
Delete all variables from the list.
Excel Range
The range name or cell reference identifying the cell or range of cells in the Excel workbook with which the highlighted variable will exchange data.
Send Variable Value to Excel Range
Configure the highlighted variable to send its value to the specified range in the Excel workbook.
Capture Variable Value From Excel Range
Configure the highlighted variable to capture its value from the specified Excel range.